
Golden, Tender, and Perfectly Toasted
There is something wonderfully comforting about a homemade English muffin. Perhaps it is the soft, slightly chewy center hidden beneath a beautifully golden crust, or the way those little nooks and crannies seem to invite butter to melt into every corner. Whatever the reason, homemade English muffins have a charm that store-bought versions simply cannot quite capture.
These classic English muffins are made with simple pantry ingredients, yet the result feels wonderfully special. They are lightly crisp on the outside, tender inside, and filled with the signature texture that makes an English muffin so irresistible. Toast one until golden, split it gently with a fork, and watch a little pool of butter disappear into its warm center.
They are lovely for breakfast, but don’t let the morning have all the fun. Serve them with eggs, cheese, jam, honey, or a generous spoonful of cream cheese. They also make beautiful breakfast sandwiches and can be enjoyed straight from the freezer whenever the craving strikes.
The best part? You don’t need a complicated baking setup. A skillet or griddle and a little patience are all you need.
Homemade English Muffins Recipe
Prep Time: 25 minutes
Resting Time: 1½–2 hours
Cook Time: 15–20 minutes
Total Time: About 2½ hours
Makes: 10–12 English muffins
Ingredients
- 1 cup (240 ml) warm milk
- 2 tablespoons unsalted butter, melted
- 1 tablespoon honey or granulated sugar
- 2¼ teaspoons (1 packet) active dry yeast
- 1 large egg
- 3 cups (375 g) all-purpose flour, plus a little more if needed
- 1 teaspoon salt
- 2 tablespoons cornmeal or semolina, for dusting
- A little butter or neutral oil, for cooking
How to Make English Muffins
1. Wake Up the Yeast
Begin by pouring the warm milk into a large mixing bowl. It should feel pleasantly warm rather than hot. Stir in the honey or sugar and sprinkle the yeast over the surface.
Let it stand for about 5–10 minutes, until the mixture becomes slightly foamy. This little pause gives the yeast a chance to wake up and ensures your dough will have the lift it needs.
Stir in the melted butter and egg.
2. Make the Dough
Add the flour and salt gradually, mixing until a soft, slightly sticky dough forms.
Turn the dough onto a lightly floured surface and knead for approximately 6–8 minutes. You are looking for a dough that becomes smooth and elastic. It may feel a little tacky at first, but resist the temptation to add too much flour. A softer dough will help create those beautiful, tender interiors.
Place the dough in a lightly greased bowl, cover it with a clean kitchen towel or plastic wrap, and leave it somewhere warm.
Allow it to rise for about 1 to 1½ hours, or until it has roughly doubled in size.
This is where the magic happens. While the dough rests, the yeast develops flavor and creates the airy structure that will eventually become those wonderful little pockets inside each muffin.
3. Shape the Muffins
Once the dough has risen, gently press it down to release excess air.
Turn it onto a lightly floured surface and divide it into 10–12 equal portions. Shape each portion into a smooth, round ball, then gently flatten it into a thick disc.
The muffins should be substantial but not overly thin. Remember, they will puff slightly as they rest and cook.
Sprinkle a baking sheet or tray with cornmeal or semolina. Place the shaped muffins on top and dust their surfaces lightly as well.
Cover loosely and allow them to rest for another 20–30 minutes.
4. Cook Until Golden
Heat a heavy skillet, cast-iron pan, or griddle over low to medium-low heat.
Lightly grease the surface with butter or oil.
Carefully place the muffins into the pan, leaving enough room between them for easy flipping. Cook slowly for approximately 7–10 minutes on the first side, then gently turn them over and cook for another 5–8 minutes.
The exact cooking time will depend on their thickness and the heat of your pan.
The secret is patience.
English muffins should cook gently. If the pan is too hot, the outside can become beautifully brown while the center remains undercooked. A moderate temperature gives the heat time to travel through the dough, leaving you with a golden crust and a soft, fully cooked interior.
If you’re uncertain, you can check one muffin by opening it gently. The center should look cooked and fluffy rather than wet or doughy.
The Fork-Splitting Secret
Once your English muffins have cooled slightly, resist the urge to slice them with a knife.
Instead, use a fork to gently pierce around the edge of the muffin and pull it apart.
This small technique makes a surprisingly big difference.
A knife cuts straight through the delicate interior, while fork-splitting preserves the irregular texture and helps create those famous nooks and crannies. Those little spaces are exactly where melted butter, honey, jam, or cream cheese likes to hide.
And honestly, that may be one of the greatest pleasures of making English muffins at home.
How to Serve Them
Fresh English muffins are incredibly versatile.
For a simple breakfast, toast the split muffin until the edges are crisp and golden, then spread generously with salted butter. Add a drizzle of honey or a spoonful of your favorite jam for something sweet.
For something savory, try:
- Fried or scrambled eggs with cheese
- Avocado with a sprinkle of salt and black pepper
- Cream cheese with smoked salmon
- Ham and melted cheddar
- Poached eggs with a little hollandaise
- Tomato, mozzarella, and fresh basil
- Peanut butter with sliced banana
They also make excellent breakfast sandwiches. Simply toast the halves, add your favorite fillings, and wrap them in parchment for an easy homemade morning meal.
A Few Tips for Perfect English Muffins
Keep the dough soft.
Adding too much flour can make the muffins dense. The dough should be soft and slightly tacky but still manageable.
Don’t rush the rise.
Good bread needs time. A warm kitchen will help the dough rise beautifully, but avoid placing it somewhere extremely hot.
Cook gently.
Low to medium-low heat is your friend. The goal is a golden exterior and a fully cooked center.
Use cornmeal or semolina.
It gives the muffins their classic lightly textured surface and prevents them from sticking.
Let them cool before splitting.
Although a warm muffin is tempting, allowing them to cool for a few minutes helps the interior gentle warmth of the skillet. Break one open with your fingers and you’ll find a tender, airy center waiting for butter. The butter settle and makes them easier to split.
Freeze extras.
Once completely cool, place the muffins in an airtight container or freezer bag. They can be frozen for up to about 3 months. Toast them directly from frozen whenever you need an easy breakfast.
The Simple Pleasure of Homemade Bread
There is a certain satisfaction in making something as familiar as an English muffin from scratch. The ingredients are humble. The method is uncomplicated. Yet the finished result feels like a little triumph.
Perhaps that’s what makes homemade bread so special. It asks for a little time, a little patience, and a little attention—and gives you something warm and comforting in return.
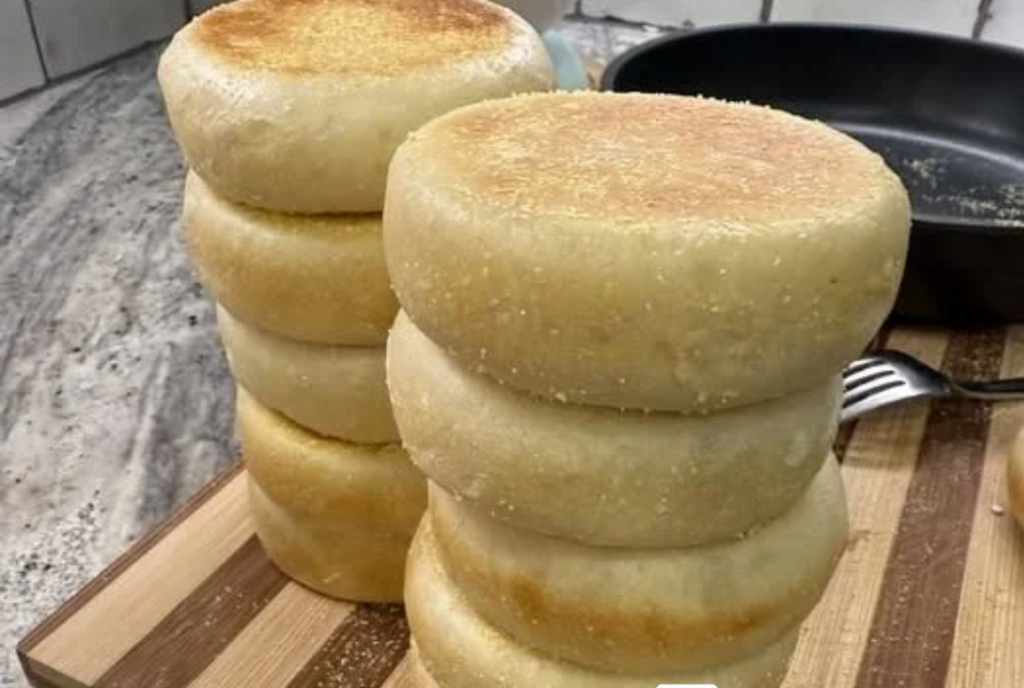
Imagine a stack of these golden muffins sitting on the kitchen counter, still carrying the gentle warmth of the skillet. Break one open with your fingers and you’ll find a tender, airy center waiting for butter. The butter melts almost immediately, slipping into every little pocket.
That first bite is the reward.
Make them slowly, toast them generously, and never underestimate the pleasure of a truly homemade English muffin.