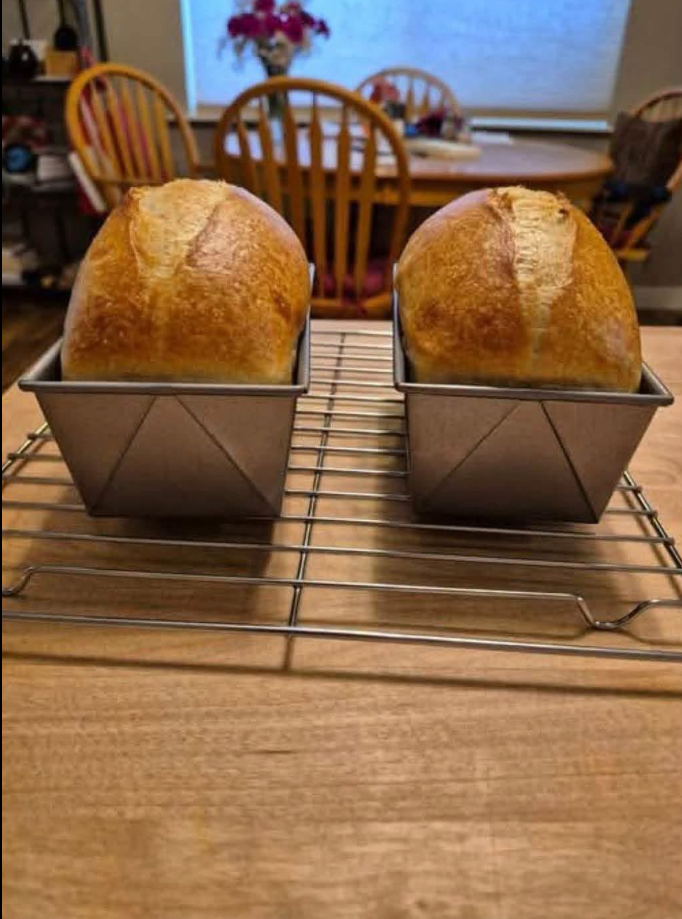
There are some recipes you make because you need bread. And then there are recipes you make because you love the whole process.
This sourdough sandwich bread is one of those recipes.
From the moment the starter hits the flour to the time those golden loaves come out of the oven, there is something calm and rewarding about making bread at home. The dough takes its time. The kitchen slowly fills with the warm smell of butter and baked flour. And when you finally pull the loaves from the oven, you get that little moment of pride that only homemade bread can give you.
These sourdough loaves have a beautiful golden crust, a soft center, and a gentle sourdough flavor. They are sturdy enough for sandwiches but soft enough to enjoy with a little butter and jam.
And honestly, fresh bread like this does not need much.
A warm slice, a little salted butter, and a cup of coffee can turn an ordinary morning into something special.
Why This Sourdough Bread Is Worth Making
I love this recipe because it gives you a loaf that feels homemade without being too rustic or hard to use.
Some sourdough breads have a very thick crust and a chewy center. They are wonderful, but they are not always what you want for a sandwich.
This loaf is a little different.
The milk and butter help give it a soft crumb, while the sourdough starter brings that mild tang and deep flavor we all look for in good sourdough bread.
It also bakes beautifully in loaf pans, which gives the bread a nice shape and makes it easy to slice.
Once cooled, the slices are perfect for toast, sandwiches, grilled cheese, French toast, or simply eating straight from the loaf.
Ingredients
For two loaves, you will need:
- 200g active sourdough starter
- 700g bread flour
- 350g warm water
- 100g whole milk
- 40g honey or sugar
- 40g unsalted butter, softened
- 12g fine sea salt
The most important ingredient here is the sourdough starter.
Make sure it is active and bubbly before you start. A starter that has recently been fed and has risen well will give your dough the strength it needs to rise.
If your starter looks flat and sleepy, give it another feeding and wait until it is lively again.
Start With the Dough
Add the warm water, milk, honey, and active sourdough starter to a large mixing bowl.
Stir until the starter breaks up and the mixture looks fairly smooth.
Add the bread flour and mix with your hand or a sturdy spoon until all of the flour is absorbed.
At this stage, the dough will look rough.
Don’t worry about that.
Cover the bowl and let the dough rest for about 30 minutes.
This simple rest gives the flour time to absorb the liquid and makes the dough easier to handle later.
After the rest, add the salt and softened butter.
Work the butter into the dough with your hands. It may feel slippery at first, but keep folding and squeezing the dough until everything comes together.
Soon, the dough will start to feel smoother and more elastic.
Give the Dough Some Strength
Sourdough does not need to be kneaded hard for a long time.
Instead, we can build strength with a few rounds of stretch and folds.
With slightly wet hands, grab one side of the dough and gently pull it upward. Fold it over the center.
Turn the bowl and repeat.
Do this around the dough until you have worked all four sides.
Cover the bowl and let it rest for about 30 minutes.
Then repeat.
A few rounds are usually enough.
You will notice a big change as you go. The dough starts out loose and sticky, but after a few folds, it becomes smoother, stronger, and easier to handle.
That is exactly what we want.
Let It Rise
Once your folds are finished, cover the bowl and leave the dough at room temperature.
This is where patience matters.
The exact rise time will depend on the temperature in your kitchen and how active your starter is. In a warm kitchen, the dough may rise in four to six hours. In a cooler room, it may need more time.
Do not worry too much about hitting an exact number.
Look at the dough.
It should become puffy and lighter, with some air visible around the sides. It should feel alive when you gently touch it.
That is a much better sign than simply watching the clock.
Shape the Loaves
When the dough has risen, gently turn it onto a lightly floured surface.
Divide the dough into two equal pieces.
Take one piece and gently shape it into a rectangle. Fold the sides toward the middle, then roll the dough into a neat loaf.
Try not to press all the air out.
You want to keep some of those lovely bubbles you worked so hard to build.
Place the shaped dough into a lightly greased loaf pan, seam side down.
Repeat with the second piece.
Cover both pans and let them rise again.
This second rise is important. It gives the loaves time to become soft and puffy before they go into the oven.
An Overnight Option
If you want to plan ahead, you can let the shaped loaves have a slow overnight rise in the refrigerator.
Cold fermentation gives the dough more time to develop flavor.
Simply cover the pans well and place them in the fridge once they have been shaped.
The next day, bring them out and allow them to finish proofing at room temperature before baking.
This is especially handy when you want fresh bread in the morning without having to do all the work first thing.
Bake Until Golden
Preheat your oven to 425°F.
When the loaves are nicely risen, make a long score across the top of each one with a sharp bread lame or knife.
The cut gives the bread room to expand as it bakes.
Place the pans in the hot oven and bake for about 35 to 40 minutes, or until the loaves are deeply golden on top.
Your kitchen should smell incredible by this point.
If the tops start browning too quickly, loosely cover them with foil for the rest of the bake.
The bread should feel firm and sound slightly hollow when tapped.
Let It Cool
This may be the hardest part of the whole recipe.
Let the loaves cool on a wire rack before slicing.
I know the smell makes it tempting to grab a knife right away. But cutting into very hot bread can make the inside gummy.
Give it at least an hour if you can.
Once cooled, use a serrated bread knife and cut yourself a thick slice.
You will see that soft, tender crumb inside and that beautiful golden crust outside.
Add butter.
Take a bite.
That’s the moment you were waiting for.
Ways to Enjoy It
This bread is incredibly easy to use.
Toast a slice and top it with butter and honey.
Make a classic turkey and cheese sandwich.
Turn it into grilled cheese with plenty of melted cheddar.
Use it for French toast on a lazy weekend morning.
Or keep it simple with a little jam.
It is also great alongside eggs, soup, roasted vegetables, or a warm bowl of chili.
And if you happen to eat a slice while standing in the kitchen, straight from the loaf, well… that counts too.
Tips for Great Sourdough Bread
Use an active starter.
A bubbly starter is one of the keys to a good rise.
Give the dough time.
Sourdough cannot always be rushed. Your kitchen temperature will affect the timing.
Watch the dough.
The dough’s look and feel are more useful than the clock.
Don’t keep adding flour.
A slightly sticky dough is normal. Too much flour can make the finished bread heavy.
Let the loaves cool.
It is tempting to slice them right away, but the crumb needs time to set.
Use a sharp knife.
A serrated bread knife will give you much cleaner slices without crushing the soft center.
A Loaf That Feels Like Home
There is something wonderfully simple about homemade bread.
You start with flour, water, salt, and a living sourdough starter. Then you add a little milk, butter, and honey, give the dough some time, and let the oven do the rest.
What comes out is more than just bread.
It is breakfast toast on a quiet morning.
It is the sandwich packed for lunch.
It is grilled cheese on a cold afternoon.
It is a warm slice passed across the table while everyone is still waiting for dinner.
And maybe that is why sourdough baking never really gets old.
You can make the same loaf again and again, but every bake still feels a little special.
These golden loaves are soft, rich, and full of that homemade flavor that store-bought bread simply cannot match.
So let the dough take its time, keep an eye on the rise, and don’t rush that first slice.
Bake it, let it cool, spread it with butter, and enjoy every bite.
Leave a Reply