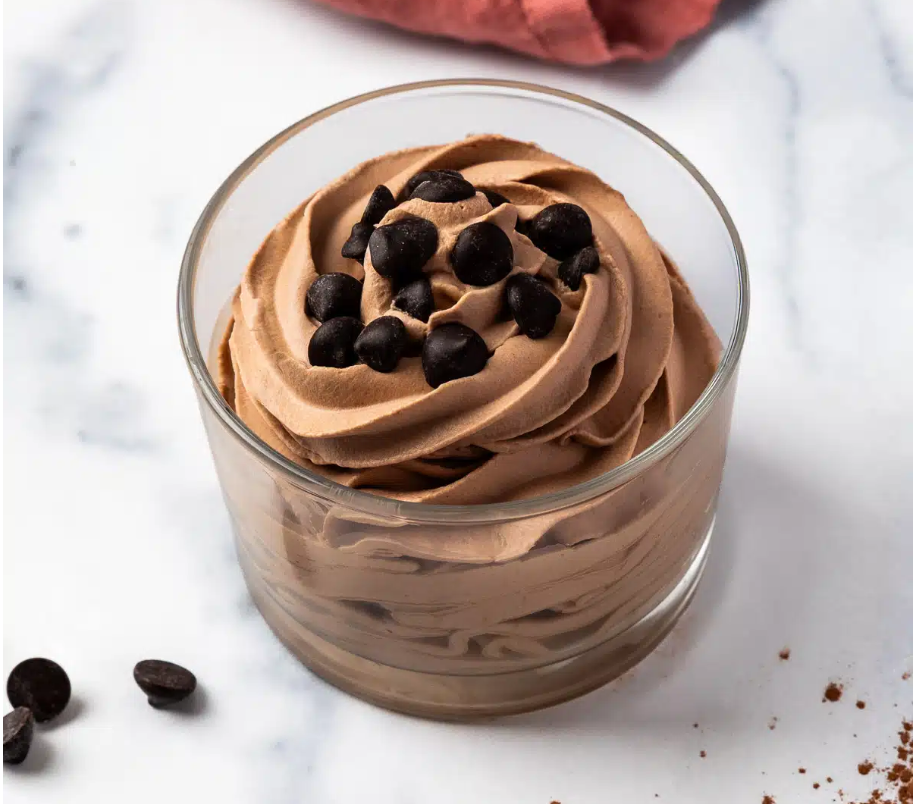

Some desserts are best kept simple, and this 3-Ingredient Keto Chocolate Mousse is a perfect example. It has a rich chocolate flavor, a smooth and creamy texture, and just the right amount of sweetness to satisfy a chocolate craving without the usual sugar.
The best part? You don’t need a long list of ingredients or any special baking skills to make it. With just three simple ingredients, you can prepare a chocolate dessert that looks beautiful in a glass and tastes like something you’d order at a nice restaurant.
This mousse is a lovely choice when you want something sweet after dinner but prefer to keep your carbs low. Serve it in small dessert cups for a family treat, or dress it up with a little sugar-free chocolate shavings when you’re having guests over.
Once you see how easy it is to make, you may find yourself coming back to this recipe whenever a chocolate craving hits.
Why You’ll Love This Keto Chocolate Mousse
Only three ingredients. You don’t need eggs, flour, or a long list of extras. Each ingredient has a clear purpose, making this recipe easy to prepare.
Rich chocolate taste. Cocoa gives the mousse its deep chocolate flavor, while the cream creates a soft, silky texture.
Low-carb and sugar-free. By choosing unsweetened cocoa and a suitable keto-friendly sweetener, you can enjoy a dessert that fits many low-carb eating plans.
No oven needed. There is no baking involved. A mixer and a few minutes of preparation are all you need.
Easy to make ahead. Prepare the mousse before dinner and let it chill in the refrigerator. When dessert time comes, it’s ready to serve.
Ingredients You’ll Need
1. Heavy Whipping Cream
Heavy whipping cream gives the mousse its thick, fluffy texture. When whipped, it traps air and creates soft peaks that make the finished dessert light enough to enjoy while still feeling rich.
Use cold cream straight from the refrigerator. Cold cream whips more easily and holds its shape better than warm cream.
2. Unsweetened Cocoa Powder
Cocoa powder brings the chocolate flavor. Choose unsweetened cocoa so you can control the sweetness and keep added sugar out of the recipe.
For a deeper chocolate taste, use a good-quality cocoa powder. Sift it before mixing to help prevent small lumps from forming in the mousse.
3. Keto-Friendly Sweetener
A powdered keto sweetener works well because it blends smoothly into the cream. Powdered erythritol, a monk fruit blend, or another powdered sweetener suitable for your diet can be used.
The sweetness level will depend on the brand you choose, so start with the amount in the recipe and adjust to taste.
3-Ingredient Keto Chocolate Mousse Recipe
Prep Time: 10 minutes
Chill Time: 30–60 minutes
Total Time: 40–70 minutes
Servings: 4
Course: Dessert
Diet: Keto, low-carb, sugar-free when prepared with suitable ingredients
Ingredients
- 1 cup (240 ml) cold heavy whipping cream
- 2 tablespoons unsweetened cocoa powder
- 2–3 tablespoons powdered keto-friendly sweetener, adjusted to taste
Instructions
Step 1: Prepare Your Mixing Bowl
For the best results, start with cold heavy cream. If your kitchen is warm, place your mixing bowl and beaters in the refrigerator for about 10 minutes before you begin.
Make sure the bowl is clean and dry. This small step helps the cream whip more easily.
Step 2: Combine the Ingredients
Pour the cold heavy cream into the bowl. Add the unsweetened cocoa powder and powdered keto sweetener.
If your cocoa powder has lumps, sift it first. This helps the chocolate blend evenly into the cream and gives the mousse a smoother finish.
Step 3: Whip Until Thick
Using a hand mixer or stand mixer, beat the ingredients on low speed at first to prevent the cocoa powder from flying out of the bowl.
As the mixture begins to thicken, increase the speed to medium. Continue beating until soft to medium-stiff peaks form.
The mousse should look smooth, thick, and creamy. When you lift the beaters, the mixture should hold its shape without looking grainy or separated.
Be careful not to overbeat it. Too much mixing can cause the cream to become grainy and eventually turn toward butter.
Step 4: Taste and Adjust
Take a small spoonful and check the sweetness. If you prefer a sweeter dessert, add a little more powdered keto sweetener and mix briefly.
If you want a stronger chocolate flavor, you can increase the cocoa slightly the next time you make it. Keep in mind that extra cocoa may make the mousse taste less sweet.
Step 5: Chill and Serve
Spoon the mousse into four small dessert cups or glasses. Smooth the tops with the back of a spoon, or use a piping bag for a more polished look.
Place the cups in the refrigerator for 30–60 minutes. Chilling helps the mousse firm up and allows the flavors to settle.
Serve cold. For a simple finish, add a light dusting of cocoa powder or a few sugar-free chocolate shavings. These toppings are optional and are not included in the three-ingredient base recipe.
Tips for the Best Chocolate Mousse
Use cold cream. This is one of the most important steps. Warm cream takes longer to whip and may not hold its shape as well.
Choose powdered sweetener. Granulated sweetener can leave a slightly gritty texture, depending on the type. Powdered sweetener usually blends more smoothly.
Start slowly with the mixer. Cocoa powder can scatter everywhere if you turn the mixer to high speed immediately.
Watch the texture closely. Stop whipping as soon as the mousse holds soft to medium-stiff peaks. Smooth and fluffy is what you’re looking for.
Chill before serving. Although you can eat the mousse immediately, a short rest in the refrigerator gives it a firmer, more spoonable texture.
Make small portions. This dessert is rich, so four small servings are often more satisfying than two large ones.
Common Mistakes to Avoid
One common mistake is using cream that isn’t cold enough. If the cream refuses to thicken, check its temperature and fat content before adding more ingredients.
Another problem is adding too much cocoa powder at once. Cocoa absorbs moisture and can make the mousse taste dry or bitter. Start with the recommended amount and adjust gradually.
Overwhipping is also worth watching for. Once the mixture becomes thick and holds its shape, stop the mixer. If it starts to look curdled or grainy, it may have been beaten too long.
Finally, remember that sweeteners vary. One brand may taste sweeter than another, so don’t assume every keto sweetener can be substituted in exactly the same amount.
Is Chocolate Mousse Keto-Friendly?
It can be. Heavy whipping cream, unsweetened cocoa powder, and a low-carb sweetener can make a suitable dessert for many people following a ketogenic diet.
However, the exact carbohydrate count depends on the brands and quantities used. Heavy cream contains some natural carbohydrates, and cocoa powder also contributes carbohydrates and fiber. Some sweeteners may affect the nutrition calculation differently from others.
For the most accurate results, calculate the nutrition using the labels on your own ingredients. Also, check the sweetener label for added sugars or fillers.
Storage Instructions
Store leftover mousse in an airtight container or covered dessert cups in the refrigerator. For the best texture and flavor, enjoy it within 2–3 days.
Because this recipe contains whipped cream, keep it refrigerated and avoid leaving it at room temperature for long periods.
Freezing is possible, but it will change the texture. The mousse may become firmer or slightly icy, so refrigeration is the better choice when you want that soft, creamy finish.
Easy Ways to Serve It
This mousse is delicious on its own, but you can make it feel special without much extra work.
- Serve it in small glass cups for an elegant dessert.
- Add a few sugar-free dark chocolate shavings on top.
- Sprinkle a little cocoa powder over each serving.
- Pair it with a small portion of fresh raspberries if they fit your carb allowance.
- Layer it with another keto-friendly dessert for a simple chocolate parfait.
If you add toppings, remember that they may change the total carbohydrate count.
Frequently Asked Questions
Can I make this mousse without a mixer?
Yes, although it takes more effort. A hand whisk can work, but you’ll need to whisk steadily until the cream thickens. A mixer is the easiest way to achieve a fluffy, consistent texture.
Can I use regular sugar?
You can, but the dessert will no longer be sugar-free or specifically keto-friendly. A powdered keto sweetener is the better choice if you’re keeping carbohydrates low.
Why is my mousse too runny?
The cream may not have been whipped enough, or it may have been too warm. Chill the mixture briefly and whip it a little more, watching carefully so you don’t overbeat it.
Can I make it ahead of time?
Absolutely. Prepare the mousse several hours before serving, cover the cups, and refrigerate them. This makes it a handy dessert for busy evenings and small gatherings.
Can I use cocoa mix instead of cocoa powder?
Unsweetened cocoa powder is recommended. Many hot chocolate mixes contain sugar, milk powder, or other ingredients that can change both the texture and carbohydrate count.
A Simple Chocolate Dessert Worth Keeping
This 3-Ingredient Keto Chocolate Mousse proves that a good dessert doesn’t need a complicated recipe. Cold cream, rich cocoa, and a little keto-friendly sweetener come together to make a smooth, chocolatey treat with very little effort.
It’s easy enough for a weeknight, pretty enough for guests, and simple to prepare ahead of time. Keep the portions small, let the mousse chill, and enjoy each spoonful slowly.
When you want a homemade chocolate dessert without turning on the oven or filling the kitchen with dishes, this is one recipe worth saving.
Recipe Card
3-Ingredient Keto Chocolate Mousse
Ingredients
- 1 cup cold heavy whipping cream
- 2 tablespoons unsweetened cocoa powder
- 2–3 tablespoons powdered keto-friendly sweetener
Directions
- Add the cold cream, cocoa powder, and sweetener to a mixing bowl.
- Beat on low speed, then increase to medium as the mixture thickens.
- Continue whipping until smooth and fluffy, with soft to medium-stiff peaks.
- Divide into four dessert cups.
- Refrigerate for 30–60 minutes before serving.
Storage: Refrigerate covered for 2–3 days.
Note: Nutrition information will vary by ingredient brand and sweetener choice. Calculate it using your specific products for the most accurate results.