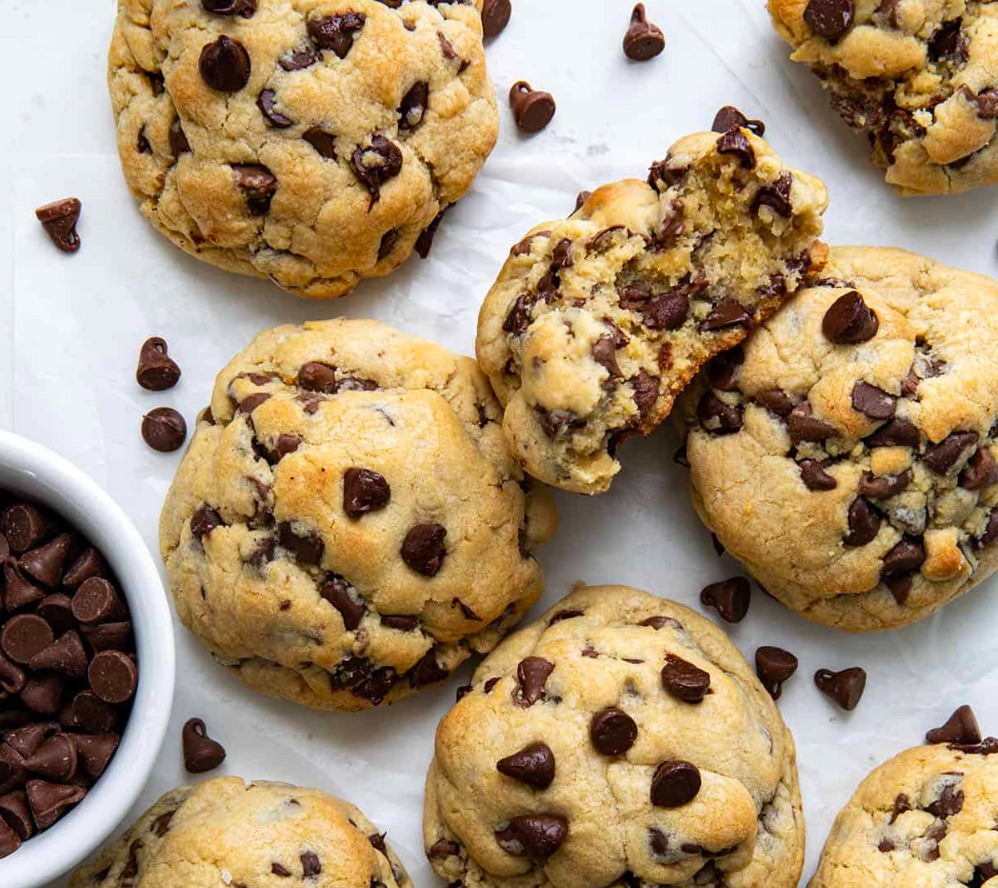

There is something special about a freshly baked chocolate chip cookie. The golden edges, soft center, and melted chocolate in every bite make it one of those simple treats that never gets old. And when the cookies turn out thick, chewy, and full of chocolate, they become even harder to resist.
These Thick & Gooey Bakery-Style Chocolate Chip Cookies are everything I love about a homemade cookie. They have a rich brown sugar flavor, plenty of chocolate chips, and a soft middle that stays deliciously tender after baking. Each cookie is generously sized, with crisp edges and a thick center that makes every bite feel like something straight from a bakery.
The best part? You don’t need any special equipment or complicated baking techniques. Melted butter keeps the process simple, while a short chill in the refrigerator helps the cookies hold their shape. A small trick with a round glass or cookie cutter at the end gives them those beautiful, perfectly round edges.
If you love big bakery-style cookies with plenty of chocolate, this recipe is one to keep close.
What Makes These Chocolate Chip Cookies Special?
A good chocolate chip cookie is all about balance. You want enough sweetness, a little salt, a rich buttery flavor, and plenty of chocolate without making the dough too soft or spreading too thin.
This recipe uses dark brown sugar for a deeper flavor and extra chewiness. The combination of brown sugar and white sugar gives the cookies a lovely texture, with golden edges and soft centers.
Melted butter adds a rich flavor and makes mixing easy. There is no need to wait for butter to soften or bring out a mixer. Just melt it, let it cool slightly, and whisk it with the sugars.
Another important step is shaping the dough into tall portions before chilling. Instead of making flat dough balls, keep them taller than they are wide. This helps create thick cookies with soft centers.
Ingredients You’ll Need
Unsalted Butter: One stick of melted butter gives the cookies their rich, buttery taste. Let it cool slightly before mixing so it doesn’t cook the egg.
Dark Brown Sugar: This is what gives the cookies their deep caramel-like flavor and chewy texture.
Granulated Sugar: A little white sugar balances the brown sugar and helps create lightly crisp edges.
Egg: One large room-temperature egg helps bind the dough and gives the cookies structure.
Vanilla Extract: Pure vanilla adds warmth and brings out the flavor of the butter and chocolate.
All-Purpose Flour: Flour provides the structure needed to keep these cookies thick.
Baking Soda: This helps the cookies rise slightly and develop golden edges.
Salt: A little salt balances the sweetness and makes the chocolate flavor stand out.
Chocolate Chips or Chunks: Use semi-sweet chocolate chips, chopped chocolate bars, or a combination of both. Chopped chocolate creates beautiful melted chocolate pockets throughout the cookies.
How to Make Thick & Gooey Chocolate Chip Cookies
1. Mix the Butter and Sugars
Start by melting the butter and allowing it to cool until warm but not hot. Add the melted butter to a large mixing bowl with the dark brown sugar and granulated sugar.
Whisk until the mixture looks smooth and well combined. Add the egg and vanilla extract. Whisk for about 30 seconds until everything is blended and slightly thickened.
2. Add the Dry Ingredients
Add the all-purpose flour, baking soda, and salt to the bowl. Use a spatula or wooden spoon to gently fold everything together.
Mix just until the flour disappears and a thick cookie dough forms. Avoid overmixing, as this can make the cookies tougher than you want.
3. Fold in the Chocolate
Add the chocolate chips or chopped chocolate chunks. Fold them into the dough so every portion gets plenty of chocolate.
For an extra bakery-style look, save a few chocolate pieces to press into the tops of the dough portions before baking.
4. Shape and Chill the Dough
This is one of the most important steps for getting thick cookies.
Divide the dough into large portions, about 1/3 cup each, or approximately 3 to 3.5 ounces per cookie.
Shape each portion into a tall, slightly rough mound or cylinder. Don’t flatten the dough or roll it into a wide, smooth ball.
Place the portions on a lined baking sheet, cover, and refrigerate for at least 45 minutes. You can also chill them overnight if you want to prepare the dough ahead of time.
5. Bake Until the Edges Are Golden
Preheat your oven to 350°F (175°C). Line a large baking sheet with parchment paper.
Arrange the chilled dough portions about 3 inches apart. These cookies are large, so bake only 4 to 6 at a time to give them enough room.
Bake for 10 to 12 minutes. The edges should look lightly golden and set, while the centers should still look soft.
Don’t wait for the centers to look completely baked. They will continue cooking from the residual heat of the baking sheet.
6. Shape the Cookies and Let Them Cool
As soon as the cookies come out of the oven, use a round glass or cookie cutter slightly larger than each cookie.
Gently move it around the outside of each warm cookie in a circular motion. This technique, often called cookie scooting, helps bring uneven edges into a neat, round shape.
Let the cookies rest on the baking sheet for about 10 minutes before transferring them to a wire rack.
This resting time allows the centers to finish setting while keeping the inside soft and chewy.
Tips for the Best Bakery-Style Cookies
Don’t Skip the Chilling Time: Refrigerating the dough helps control spreading and makes it easier to keep the cookies thick.
Keep the Dough Portions Tall: The shape matters. Taller dough portions help create the thick bakery-style look.
Use Good-Quality Chocolate: A mix of chocolate chips and chopped chocolate gives you different textures and plenty of melted chocolate pockets.
Don’t Overbake: The centers should still look a little soft when you remove the cookies from the oven. Baking them until completely firm can leave you with dry cookies.
Give Them Room: Large cookies need extra space on the baking sheet. Crowding them can lead to uneven baking.
How to Store Chocolate Chip Cookies
Once completely cooled, store the cookies in an airtight container at room temperature for up to 4 days.
If you want to enjoy them warm, place one cookie in the microwave for about 8 to 10 seconds. The chocolate will soften again, and the center will taste freshly baked.
You can also freeze the unbaked dough portions. Place them on a tray until firm, then transfer them to a freezer-safe container or bag. Bake from frozen, adding a little extra baking time as needed, and check that the centers are properly baked.
Frequently Asked Questions
Why did my cookies spread too much?
The butter may have been too warm, or the dough may not have been chilled long enough. Make sure the butter has cooled slightly and refrigerate the shaped dough for at least 45 minutes.
Can I use light brown sugar instead of dark brown sugar?
Yes. Light brown sugar works well, too. The cookies may have a slightly lighter molasses flavor, but they will still be delicious.
Can I make smaller cookies?
Absolutely. Divide the dough into smaller portions, but reduce the baking time and keep an eye on the edges and centers.
How do I get soft centers without raw dough?
Remove the cookies when the edges are set and lightly golden but the centers still look soft. Let them rest on the hot baking sheet for 10 minutes so they can finish setting.
Final Thoughts
Sometimes the simplest recipes become the ones we make again and again. These Thick & Gooey Bakery-Style Chocolate Chip Cookies are a perfect example. With melted butter, dark brown sugar, generous chocolate chunks, and a little patience during chilling, you can make beautiful bakery-style cookies right in your own kitchen.
Serve them slightly warm with a cold glass of milk, share them with friends, or keep a few tucked away for a sweet afternoon treat. Once you try that soft, chocolate-filled center, you may find yourself making another batch sooner than you planned!
Recipe Card
Thick & Gooey Bakery-Style Chocolate Chip Cookies
Prep Time: 15 minutes
Chill Time: 45 minutes
Bake Time: 10–12 minutes
Total Time: About 1 hour 12 minutes
Yield: Approximately 6–8 large cookies
Ingredients
- 1/2 cup (1 stick) unsalted butter, melted and slightly cooled
- 1/2 cup packed dark brown sugar
- 1/4 cup granulated sugar
- 1 large egg, at room temperature
- 2 teaspoons pure vanilla extract
- 1 3/4 cups all-purpose flour
- 3/4 teaspoon baking soda
- 1/2 teaspoon salt
- 1 1/2 cups chocolate chips or chopped chocolate chunks
Instructions
- Melt the butter and let it cool until warm but not hot.
- Whisk the melted butter, dark brown sugar, and granulated sugar in a large bowl until smooth.
- Add the egg and vanilla extract. Whisk for about 30 seconds until slightly thickened.
- Add the flour, baking soda, and salt. Gently fold until a thick dough forms. Do not overmix.
- Fold in the chocolate chips or chunks.
- Divide the dough into portions of about 1/3 cup each (3–3.5 ounces). Shape into tall mounds or cylinders.
- Cover and refrigerate for at least 45 minutes.
- Preheat the oven to 350°F (175°C). Line a baking sheet with parchment paper.
- Arrange 4–6 chilled dough portions on the baking sheet, leaving about 3 inches between them.
- Bake for 10–12 minutes, until the edges are golden and set but the centers still look soft.
- Use a round glass or cookie cutter to gently shape the warm cookies into neat circles.
- Cool on the baking sheet for 10 minutes, then transfer to a wire rack.
Enjoy your thick, gooey homemade chocolate chip cookies!